Most of the latest PC’s nowadays have Solid State Drives as they have faster read and write speeds, faster boot speed, are more durable, quieter and consume less power. However, these benefits come at a cost. The SSD drives are a lot more expensive, if you compare cost per GB, with a conventional Hard Drive.
PC manufacturers, in order to reduce the cost and make the prices reasonable, cut down on the amount of data the SSD’s can store. Mechanical Drives offer you almost triple the space compared to similarly priced SSD.
Limited space on SSD means that you have to keep an eye on the data which is getting piled up on your primary drive. Conventional drives which were mechanical used to become sluggish when they had a lot of junk and temporary files piled up on them.
The SSD’s on the other hand can perform faster even when you have a lot of data on them. They may not show any symptoms of slowing down, but, it’s still advisable to keep your primary hard drive free of temporary and junk files.
How to free up Storage space in Windows 10
Windows 10 makes it a lot easier to free up storage space from within the Settings app. Moreover, you can also use the Disk Cleanup utility which was available in older Windows systems and has also been retained in Windows 10.
Free up Storage space using Settings app
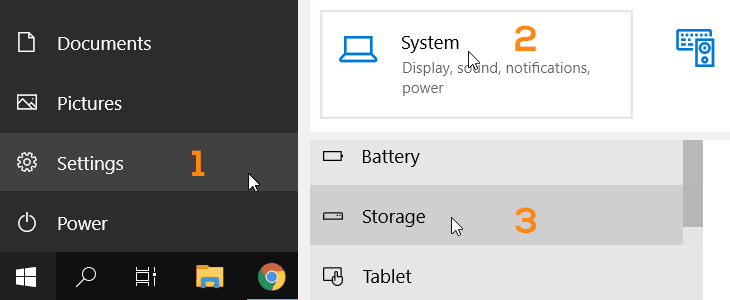
In the taskbar search box, type Storage Settings. Open the app by clicking on Storage Settings. You can also open the Storage setting by Clicking on Settings in Start Menu, then selecting System > Storage.
The storage Settings screen would show the Space taken by each component of the operating system. You can click on Temporary Files to show the list of the files which can be safely deleted.
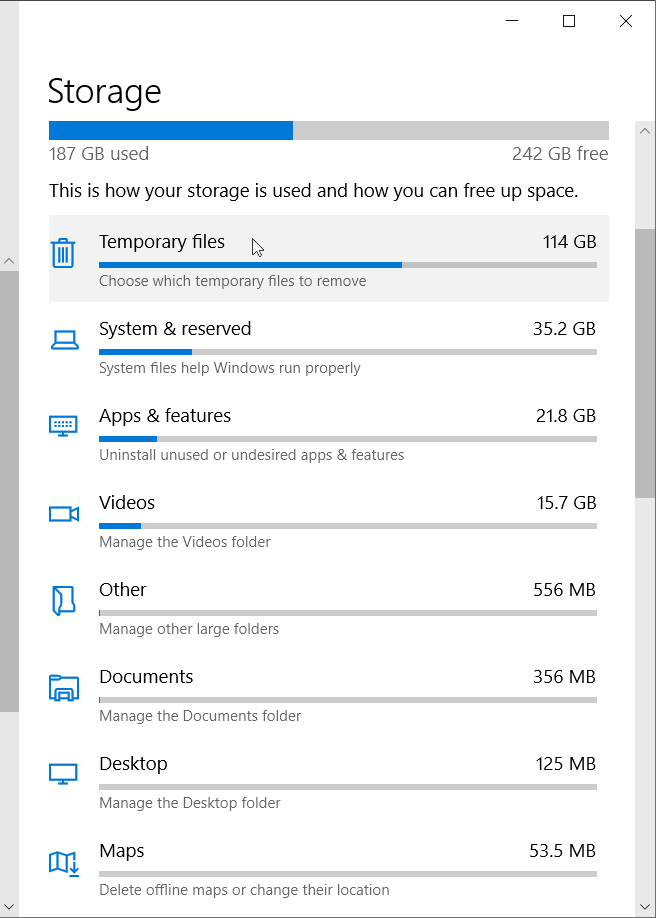
However, keep in mind that Windows treats the Files in your Downloads Folder as temporary files. The default Downloads Folder on your PC can be accessed using the path
C:\Users\<username>\Downloads. Where you have to replace <username> with your Windows username.
So, take a backup of all the important files from the Downloads folder, before proceeding further.
On clicking Temporary Files. Windows would scan the primary or the C:/ drive and then show you a list of the files which can be deleted. Uncheck the Downloads check box. You should select the Downloads checkbox only when you have taken a backup of all the important files.
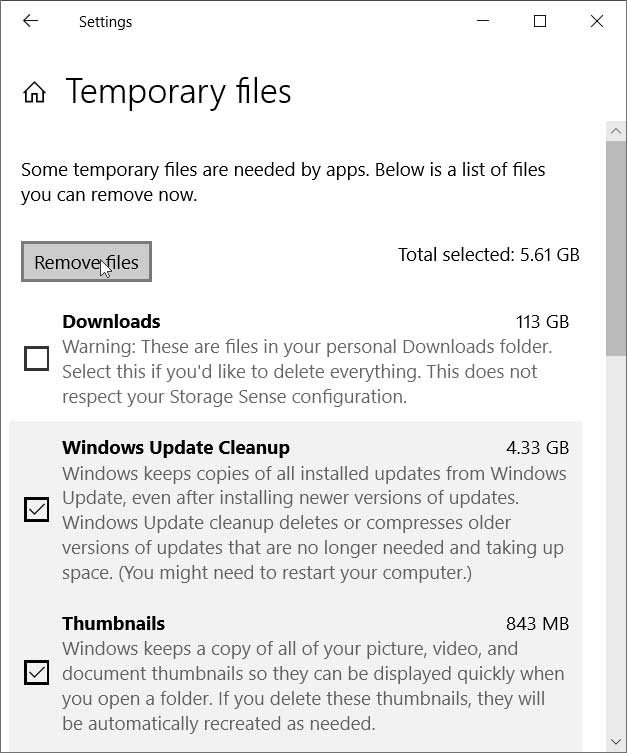
Temporary Files includes Windows update files which were already installed and not needed. Thumbnails files are needed to show a small file preview of your photos and videos in Windows Explorer, Windows would recreate them if deleted. You should delete them if the thumbnail preview is not showing in Windows Explorer. This would rebuild the thumbnail database and most of the time fixes the problem.
So, read the description under each checkbox heading, carefully before proceeding ahead.
Finally, You can click on Remove Files to clear all the unnecessary temporary files.
Free up Space using Disk Cleanup
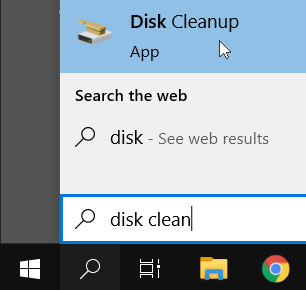
In the start menu search bar, type Disk Cleanup and select Disk Clean up from the results.
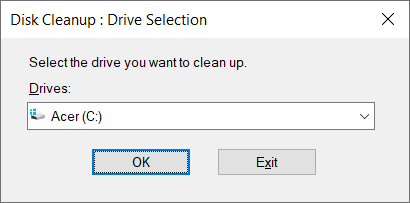
Select the Drive you want to clean up from the dropdown list. You should select your C:/ drive as that’s where most of the temporary files are located.
Select the files which you would like to delete. Read the description of each item in the list by selecting it. Check the check box, to mark it for deletion.
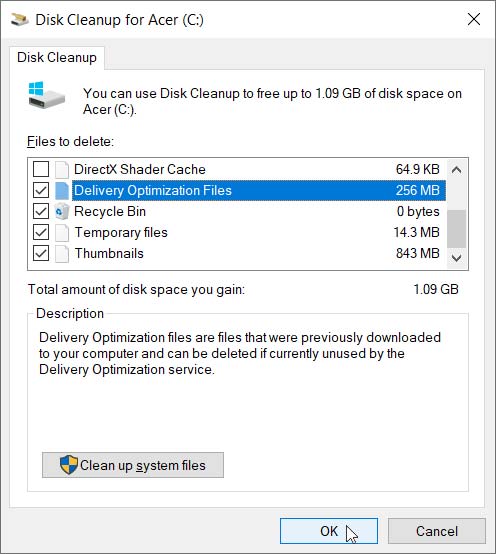
Finally click on OK to delete the files.

