Illustrator’s Pathfinder is one of the basic tools which you must familiarise yourself with, if you are a beginner in Illustrator. Pathfinder is a group of tools which is used to make compound shapes by using two or more shapes.
In layman’s terms it is similar to a scissor or paper cutter which can cut a shape into two or more different shapes. But it also has tools which work as a glue stick for sticking two or more shapes together.
Illustrator or for that matter any design software gives you the most basic shapes like squares or circles and it’s your job to use them to create more complex shapes. You can combine basic shapes like, two ovals and a rectangle to create a cylinder.
That’s where you can use the Pathfinder tool to stitch the shapes together to create the new shape. Pathfinder palette has many tools which can be used to combine, divide, trim, exclude objects in illustrator. Each tool has its own utility in different situations.
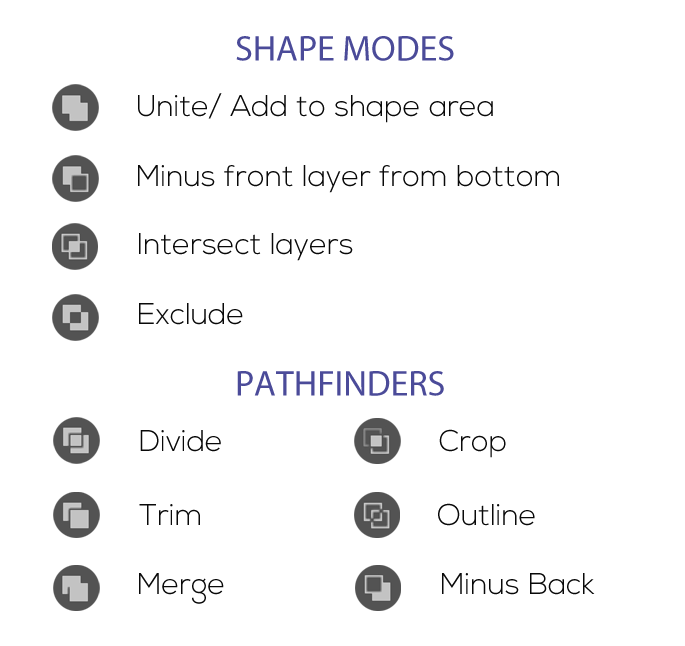
For example, the Trim tool in the Pathfinder Palette can be used as a cookie cutter. You place an object or shape on top of the other and it would cut a hole in the bottom layer in the shape of the top shape.
How to Use the Pathfinder Tool
The Pathfinder group of tools can be accessed from the Window menu. Go to Window and Select Pathfinder. You can also press the shortcut Shift + Ctrl + F9 to enable the Pathfinder panel.
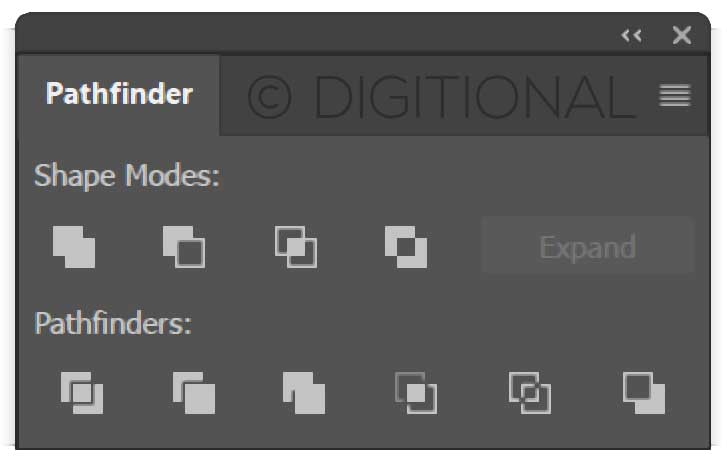
You get two sets of tools in the Pathfinder panel. The Shape modes and the Pathfinder tools. The tools and the their functions are explained below.
Unite
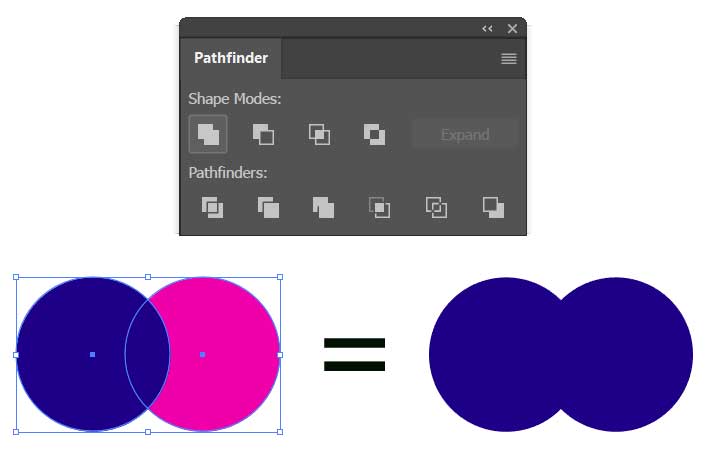
Unite tool would combine two shapes together to create a new shape. You have to select the shapes, you want to combine together, with the Selection Tool(V) and then click on Unite in the Pathfinder Panel. The two shapes would be combined with their paths joined together.
Minus Front
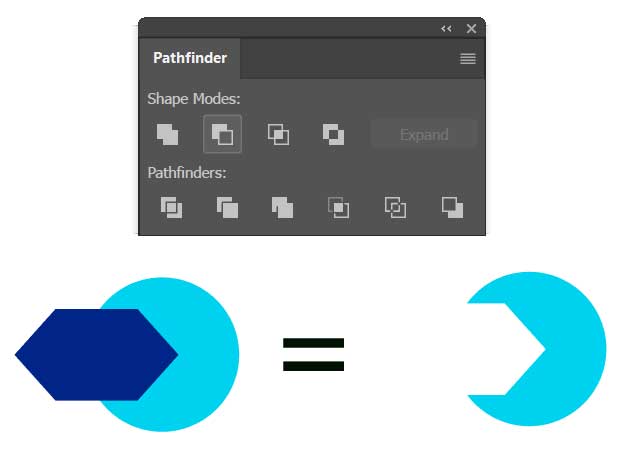
This tool would remove the overlapping areas of the top shape from the bottom shape. It lets you subtract or minus the top shape from the bottom shape.
You have to select the two shapes with the Selection Tool(V) or you can press and hold Shift and then click on both the shapes to select them. After Selecting the shapes, click on the Minus Front.
Minus Front can work with more than two shapes. If you place two shapes on top of the bottom shape then the path information of both of those would be removed from the bottom shape.
Intersect Layer
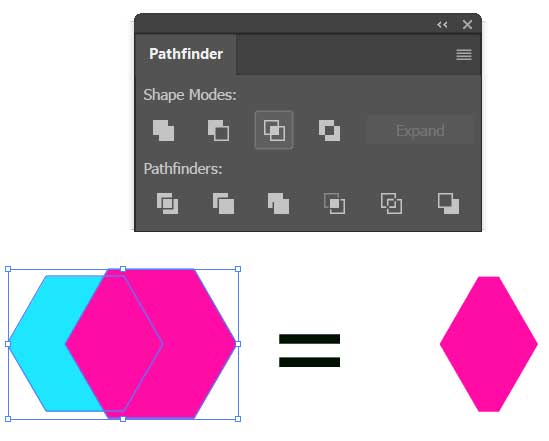
The Intersect layer tool would select the path or the area where the layers intersect each other. You have to select the Layers with the Selection Tool (V) and then click on the Intersect tool in the pathfinder panel.
Intersect Tool can work with more than two shapes and only the area intersected by all the shapes would be selected to create the new shape.
Exclude
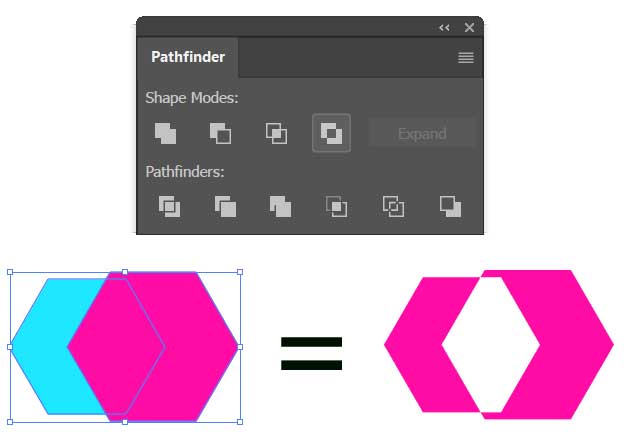
Exclude Tool has the exact opposite functionality of the Intersect Layer tool. Instead of selecting the intersection area of two or more shapes it would exclude it from the final shape. The final shape is grouped together and if you want to edit these shapes separately then right click and select Ungroup.
Divide
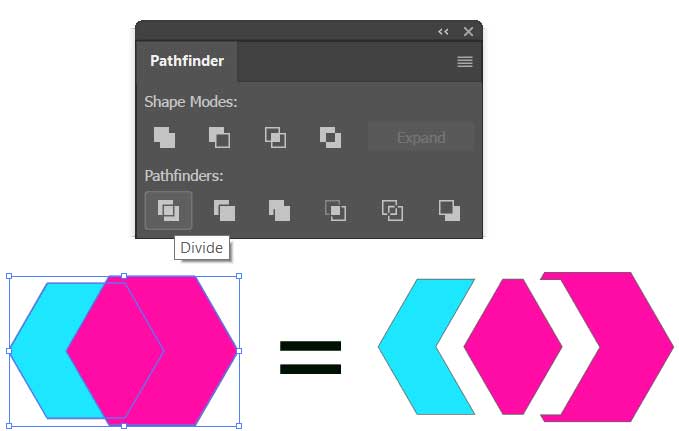
The Divide Tool would divide the shapes along the intersecting paths and create more shapes. The tool would divide the shapes but it groups them together. So, if you want to separate the resultant shapes then you would have to right click on it and then select Ungroup from the context menu.
Trim
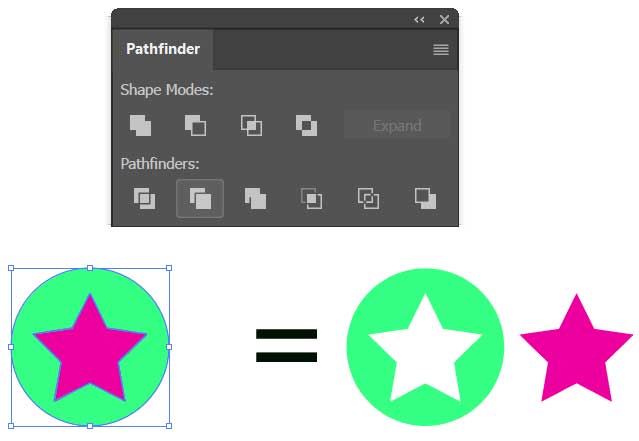
Trim tool works like a cookie cutter. The top most layer or shape would be used to trim the bottom layers. The bottom layers would be trimmed in the shape of the topmost layer. Place the trimmer shape on top then select both the trimmer and bottom shape with the selection tool and click on Trim tool in Pathfinder pallet.
Merge
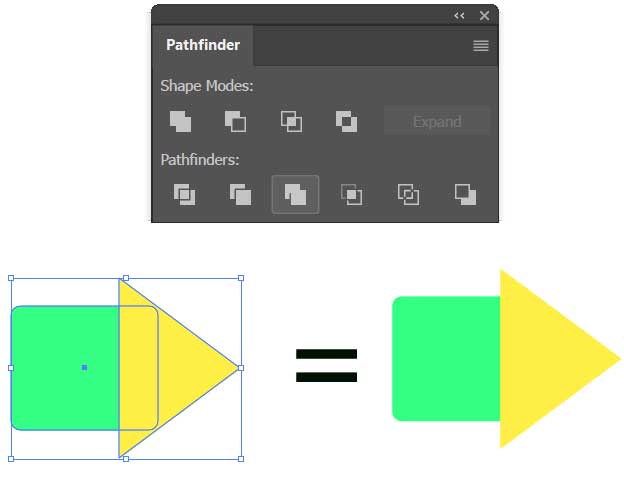
Merge tool is similar to the Trim tool, however, there is one difference. If the Merge tool is applied to two or more shapes with the same color then those two shapes would be merged together. If applied to multicolored shapes it would behave exactly like the trim tool.
Crop
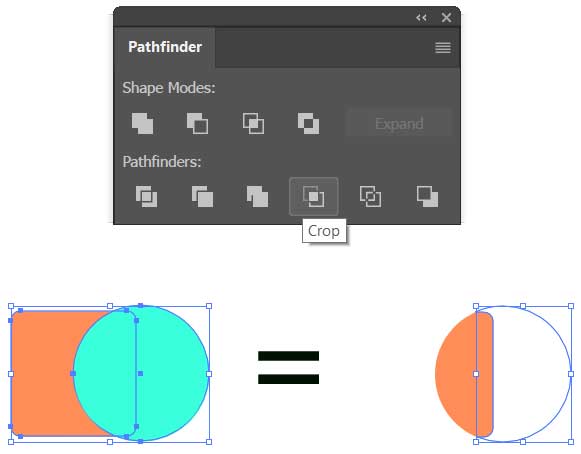
Crop tool would crop the shapes leaving the overlapping area and the path information of the top shape intact instead of deleting it.
Outline
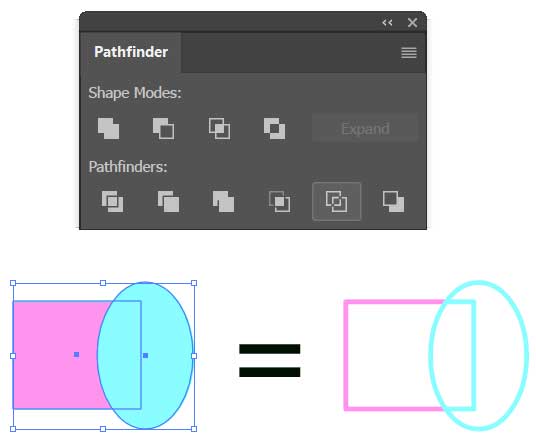
As the name suggests this tool would select the outlines or the paths of all the shapes. These outlines can be selected individually. After applying the Outline tool the resultant outlines are grouped together. To select and separate them right click and select Ungroup.
Minus Back
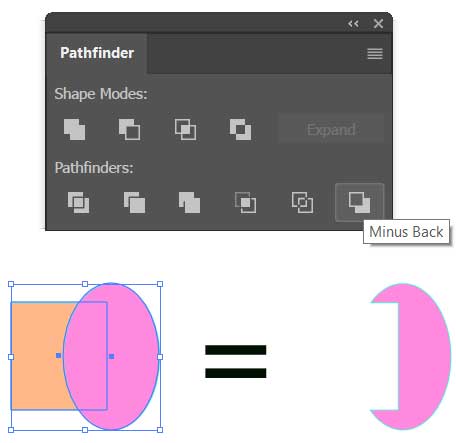
Minus back is opposite of Minus Front and would remove the bottom shape and its overlapping areas from all the top layers.
Practice with all these Pathfinder tools, using two or more layers to better understand their functionality.
RELATED: How to Align Objects Using The Align Tools in Illustrator
RELATED: How to Estimate the Life Span of your SSD storage
RELATED: How to use the Start Menu’s Inbuilt Image Search in Windows 10
RELATED: How to Join Videos using The Photos app in Windows 10
RELATED: How to Add or Replace Audio in Video Files using the Photos app in Windows 10

